22 June 2022

Colour INKspiration Challenge #123 feat. Artfully Layered Bundle


Hello my crafty friends!  Welcome and thanks for popping in!  Colour INKspiration Challenge #124 has opened up over on Facebook and photo inspiration for this Challenge was chosen by fellow Crew Member Lou Kitzelman and the Guest Designer is the fabulous Kristie Slabbers-Kooltjes.  I can't wait to see what Kristie was designed for us.

  Picture credit - http://joseherworld.blogspot.com/2016/09/ibera-argentina.html

The card I have created features the Artfully Layered Bundle.  Sadly this Bundle is no longer available to purchase - it was part of the Last Chance Promotion and has now sold out.  I have to say, I have really enjoyed using the stamps and co-ordinating dies over the last six months.


I will admit I struggled using these bright and vibrant colours in this Challenge - not my usual go to which is why I love these colour challenges so much.


Supplies:

  • Bundle:  Artfully Layered
  • Dies:  Tailor Made Tag Dies
  • Cardstock:  Night of Navy, Basic White, Daffodil Delight, Parakeet Party, Tahitian Tide, Vellum
  • Inks:  Parakeet Party, Daffodil Delight, Tahitian Tide 
  • Embellishments:  2022-24 In Colour Matt Decorative Dots (Parakeet Party), Metallic Woven Ribbon (Starry Sky), Linen Thread
  • Tools:  Paper Trimmer, Mini Stampin' Cut & Emboss Machine, Blending Brush
  • Adhesives:  Tombow Liquid Glue, Dimensionals

Let's Make It:

  • For this card you will need a card base, two pieces of Basic White trimmed to fit the front and the inside, a piece of Night of Navy cs large enough for the biggest tag, a piece of Daffodil Delight cs for a leaf die-cut, a piece of Tahitian Tide cs for a leaf die-cut, a piece of Parakeet Party cs for a leaf die-cut.

  • Die cut each leaf from the Daffodil Delight, Parakeet Party and Tahitian Tide cardstock.  Leave one side of the monstera-shaped leaf die-cut as well as all the middles of the Parakeet Party leaf die-cut to help with the definition of each die-cut. Stamp tone-on-tone over each leaf using the distressed print stamp - this creates texture as well as softens the colour a little.

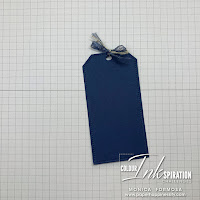
  • Die cut a tag in Night of Navy cs and make a bow at the top using both Linen Thread and Metallic Woven Ribbon 

  • Gently blend Parakeet Party ink in the centre of one piece of Basic White cs using a Blending Brush.  Glue this to the card front.

  • Glue the leaves to the tag and add the Matte Decorative Dots and attach this to the coloured piece of Basic White with Dimensionals.   
  • On the second piece of Basic White cs, gently blend Parakeet Party ink in the top left and bottom right corners and add second and third generation stamping over the top using the same distressed print image used on the leaves.  Add a vellum leaf in the bottom right corner for a subtle continuation of the design from the front, trim any over-hang and glue to the inside .


Feel INKspired to join the challenge? I would love for you to join us! It's a great way to have fun with different colours!

Firstly, hop on over and check out the creations of the Colour INKspiration Crew in the Challenge album on our Facebook page. Then you have 12 days from today to make and upload your creation to the Facebook Colour INKspiration Group. You don't have to have a blog to participate but if you do, you can link back to your post. Just a reminder to use all the challenge colours. Neutrals such as Whisper White, Very Vanilla, Crumb Cake, Sahara Sand and Basic Black are also allowed as well as Metallics. 

If you feel inspired, click here and ask to join Colour INKspiration, add the group to your Favourites and share it with your crafty friends so they can join in the fun too. We can't wait to see what you create with these gorgeous colours! 

Thank you so much taking the time to drop in. I hope I have inspired you and if you like what I have shown or if you have any questions, please leave them in the comments section below.   

Until next time, take care, stay safe and have a great day!  

Monica xx

.
 
To purchase any of the products I've used today  you can click any of the direct links in the Product List below or click the 'Shop Online' tab at the top of this page.  Both ways will get you directly to my online store, where you are only minutes away from getting products delivered straight to your door.

Or maybe you have a wish list as long as your arm? If so, the best deal in the catalogue is to join my Stamping Queens Stamping Team. Fill your Starter Kit with your choice of products to the value of $235.00 for only $169.00 with a 20% discount every time you place an order! No risk attached!
 

. 

Product List

.

 .


08 June 2022

Simple Stamping - Colour INKspiration Challenge #123


Hello my crafty friends!  Welcome and thanks for dropping in!  Colour INKspirations Challenge #123 has opened over on Facebook and I have to say, I absolutely loved working with these colours.  This colour palette has a soothing and calming vibe and I wanted to create along those lines.


My card was created using some simple stamping around a central point using the Challenge colours.  First and second generation stamping was used to create depth.  Adding the 'dottage' is definitely a must in my opinion as it softens the overall image and also hides any mistakes.


Supplies: 
  • Stamp Sets:  Dahlia Days, Forever Fern
  • Cardstock:  Blushing Bride, Basic White
  • Ink:  Blushing Bride, Soft Succulent, Shaded Spruce Evening Evergreen
  • Punch:  Label Me Lovely
  • Embellishments:  Brushed Brass Butterflies
  • Tools:  Paper Trimmer
  • Adhesives:  Tombow Liquid Glue, Dimensionals
How To Make:
  • For this you will need a card base in Blushing Bride cardstock, a piece of Basic White cardstock - any size will do, mine is 1/2" smaller on two sides, a second piece of Basic White for the inside if desired, a scrap of Blushing Bride large enough to punch with the Label Me Lovely Punch.
  • Take the piece of basic white and draw around something round in pencil to give a rough idea on where to stamp. 
  • Using a medium-sized image from Forever Fern, stamp this in 2nd generation Soft Succulent to start with.
  • Taking one of the smallest images from the same stamp set, stamp this image in 1st generation Soft Succulent.
  • Using Shaded Spruce, stamp the trio of leaves image from Dahlia Days in 1st and 2nd generation ink.
  • Taking the fern-like image from Dahlia Days and stamp this in Evening Evergreen.
  • Stamp the trio of flowers from Dahlia Days stamp set around the edges of the greenery in Blushing Bride.
  • To complete your stamping, take the dottage stamp from Forever Fern and stamp in 1st and 2nd generation Soft Succulent filling in any gaps, spaces and covering any boo boos.
  • Once ink is dry, erase the pencil marks. 
  • Glue this directly onto the card front.
  • Stamp the greeting in Evening Evergreen onto the piece of Blushing Bride and punch using Label Me Lovely Punch. Add Evening Evergreen ink to the edge of the punched label and once dry, attach this to the card front with Dimensionals.
  • Add three butterflies from the Brushed Brass Butterflies to finish off.
  • On the second piece of Basic White cardstock, add a few more of the same foliage images to the opposite corners and glue to the inside.


Feel INKspired to join the challenge? I would love for you to join us! It's a great way to have fun with different colours!

Firstly, hop on over and check out the creations of the Colour INKspiration Crew in the Challenge album on our Facebook page. Then you have 12 days from today to make and upload your creation to the Facebook Colour INKspiration Group. You don't have to have a blog to participate but if you do, you can link back to your post. Just a reminder to use all the challenge colours. Neutrals such as Whisper White, Very Vanilla, Crumb Cake, Sahara Sand and Basic Black are also allowed as well as Metallics. 

If you feel inspired, click here and ask to join Colour INKspiration, add the group to your Favourites and share it with your crafty friends so they can join in the fun too. We can't wait to see what you create with these gorgeous colours! 

Thank you so much taking the time to drop in. I hope I have inspired you and if you like what I have shown or if you have any questions, please leave them in the comments section below.   

Until next time, take care, stay safe and have a great day!  

Monica xx

.
 
To purchase any of the products I've used today  you can click any of the direct links in the Product List below or click the 'Shop Online' tab at the top of this page.  Both ways will get you directly to my online store, where you are only minutes away from getting products delivered straight to your door.

Or maybe you have a wish list as long as your arm? If so, the best deal in the catalogue is to join my Stamping Queens Stamping Team. Until the end of November, you'll get the $169.00 Starter Kit - filled with your pick of products to the value of $235.00 - for only $130.00 with a 20% discount every time you place an order!
 

. 

Product List 


You Make My Heart Smile - Colour INKspiration Challenge #180

Hello and welcome!  And thanks for popping in. Our first Colour INKspiration Challenge for 2025 has kicked off and we have been given these ...